Saturday 21 October 2017

Hello dear friends and readers :)
Welcome to this week's Finish for the Weekend :) Please see below for instructions on how to join in.
I'm sorry there was no post last Friday, I had nothing finished and nothing much to blog about either!


There have been a lot of storm systems about this week. What sort of name is "Brian" for a storm ?! (no offence to all the Brians out there) And who names these things anyway ? Over the water, in my homeland of Northern Ireland, it's been particularly stormy: lots of places closed down - schools, banks, parks - however I think they survived relatively unscathed. My Mum had a few of her garden pots blow over and smash, but thankfully no structural problems with her house.

Here in England just now it's a beautiful autumn day, and as I type the wind is still gusting ferociously through our garden, a great day to hang the washing out. I love this photo of near horizontal t-shirts.


So how's your week been ? Mine's been pretty good, nothing majorly exciting or anything, just a lovely balanced week of friends, coffee, chores and of course crochet.

For this week's finish I have a cute granny square bag made in a rather riotous Sirdar Click yarn.


I started this last year when we were driving up to Scotland to catch the ferry over to Northern Ireland at Easter. I had just had the dreadful news the night before that my Dad had died really quite suddenly, and then we had this 14 hour journey of hell to get through. I cried the whole way in the car, and then, as the traffic was so bad, we then missed the ferry. By the time we actually got on the ferry I was ready for sleep really, but in the absence of anywhere to lie down I did some crochet to keep me busy. All I could think to do was a granny square. I'd no idea what to use it for but I had to do something.


Whilst in NIreland I decided it was going to become a bag, so I crocheted another granny square the same size, and then also crocheted a strap. The strap was just around 7 stitches wide, and enough rows of dc to make it the right length for a cross-body bag.
These 3 bag-parts have been lying in my work basket for about 18 months now! It was time to finish it off properly.


I sewed the granny squares together on 3 sides, just normal sewing. I had thought about dc'ing them together but as this wool is quite chunky I thought a dc join would be too bulky. I then sewed on a gorgeous tomato-soup-red big button and crocheted a length of chains to make a button loop.


The final step was to line the bag. I'm not a massive orange fan so it was a good opportunity to use up this spotty orange fabric that had been in my stash for some time.


I used the sewing machine to sew the lining fabric sides together, and to hem the top, and then I hand-sewed the fabric inner to the crocheted outer. And ... ta-dah! A lovely sunny and bright granny square bag ....


It's another one of those projects where I just think to myself - why did I leave this so long ?? - because it only really took another hour or so of work to complete. Anyway, its done now, and I think I'm going to add it to my stockpile for craft fairs.


There may not be a FFTW post next week as I am going over to NIreland - just Little Tomboy and me - as its half-term holidays for us. We are leaving the teenagers here with Daddy, and a coupe of friends are joining us for a few days. I'm very much looking forward to going "home" and spending a few days just relaxing.


Happy half-term everyone!
Til next time,
Jillxxxxx


**************************************************

Welcome to Finish for the Weekend, a weekly chance to link up and share with the blogging community some of the projects you have completed this week. The only rule is that your post must be about an item you have finished this week, hopefully to help reduce some of those piles of UFO's!

Here's how to join in:

1. Write a blog post about your finished project.
2. Link back to Finish for the Weekend by adding this text as a link on your post:
http://emeraldcottage.blogspot.co.uk/search/label/Finish%20for%20the%20Weekend
3. Publish your post
4. Link back from here to your post by clicking "Add Link" and adding your post's URL
5. Spread the bloggy love by visiting and commenting on the other Finish for the Weekend posts.

The Finish for the Weekend post will open for new links on a Friday at 12noon London time, and it will stay open until Monday at 12noon to allow for overseas bloggers to join in. These times may vary but I will do my best to keep it roughly the same. Looking forward to seeing all your posts !


Friday 6 October 2017

Finish for the Weekend

Hello dear friends and readers!

Welcome to Finish for the Weekend, where we share finished projects this week in an effort to clear up those UFO's! Please see below for instructions on how to join in.

I hope you've had a good week. I haven't. I've had a bad tooth abscess which has knocked me for six all week. I've been to the emergency dentist twice, been on two loads of antibiotics, and even ended up at A&E for an IV dose of antibiotics. As I type its still extremely painful, and still got a bit of a lump on my cheek, it was about golf-ball sized, though I think its finally starting to go down a bit. So I've not done much except pop pills and sleep (or try to) all week.


But I was determined to have a finish to show you today. Its not a very exciting one I'm afraid. I made a cover for our remote-control box. How exciting.
We bought new sofas a couple of years ago, they are electronic recliners, and as such each side moves independently of the other. This means if anything (e.g. a remote control) falls down the gap between the sofa cushions, then it's lost under a heap of metalwork and is bloomin' awkward to get back. We needed a box hat was large and shallow because one of our remotes is super-sensitive and if you so much as breath on it, it starts up the playstation which then hums annoyingly. So we can't just chuck them all in a box because inevitably something sets it off. I found a shoebox lid to be just the right size.


And I decided to crochet a cover for it, as you do. So I started off in a nice soft grey to match the sofa. Well that was two years ago. Seriously, I have no staying power at all, its not a very big project and yet I still got distracted enough to put it to one side and work on something else. So we've had this slightly tatty shoe box lid lying around the front room for all that time holding the remotes.


Today I took one look at the shoebox lid and decided to finish off the cover for it. I wanted a nice inner to the box, so I cut a piece of cardboard (just from a cereal box), glued a piece of felt to one side of it to give it a bit of softness, then covered in this grey and turquoise fabric. I was going to get the sewing machine out but actually I decided that simply turning the edges under and hot-gluing them in place would be easier and probably neater.


The crochet starts off with a solid granny rectangle. I worked out the starting chain length by using the difference between the length and the width of the shoebox lid. I think. Well, it was 2 years ago. I can't remember what yarn the grey was, Stylecraft Special DK, in silver possibly. Anyway, I increased on every round until the rectangle was big enough to fit the base (ish), then stopped increasing to make the sides grow straight up instead of out flat.


After a bit I changed to a sort of duck-egg-green-blue, and as I started that bit just last week I can tell you that it is Paintbox DK in Washed Teal. I love these Paintbox yarns, so soft to work with.


And then it was a question of keeping going until it was big enough. I made the sides high enough so they could come up over the top and tuck down inside, to hide all the cardboard.


I used hot glue to attach the cover to the box, and put a really good blob of it into each corner to make sure it stayed neat.


And that's it. A really simple little make that should not have taken 2 years!


I'm super happy with how it turned out, far better than I hoped :)


And it would even make a rather nice little crochet-work-basket-cum-tray :) I see more of these in my future :)


Til next time,
Jillxxx

**************************************************

Welcome to Finish for the Weekend, a weekly chance to link up and share with the blogging community some of the projects you have completed this week. The only rule is that your post must be about an item you have finished this week, hopefully to help reduce some of those piles of UFO's!

Here's how to join in:

1. Write a blog post about your finished project.
2. Link back to Finish for the Weekend by adding this text as a link on your post:
http://emeraldcottage.blogspot.co.uk/search/label/Finish%20for%20the%20Weekend
3. Publish your post
4. Link back from here to your post by clicking "Add Link" and adding your post's URL
5. Spread the bloggy love by visiting and commenting on the other Finish for the Weekend posts.

The Finish for the Weekend post will open for new links on a Friday at 12noon London time, and it will stay open until Monday at 12noon to allow for overseas bloggers to join in. These times may vary but I will do my best to keep it roughly the same. Looking forward to seeing all your posts !

Wednesday 4 October 2017

Maple Roses

Hello dear friends and readers :)


I've got a sweet little autumn tutorial for you today. Having seen this post on the Pillar Box Blue blog I'd been making to make some paper roses for a while. Meanwhile I'd been out leaf-gathering with Little Tomboy last week and we'd gathered lots of gorgeous red, russet and yellowy maple leaves. Loads of them. More than we knew what to do with really, I mean there's only so many leaf-rubbings you can do.


So I wondered could I use the maple leaves to make some roses. I had a bit of a look around on Pinterest and found quite a few tutorials, so I gave it a go. Turns out its very easy and also uses up loads of maple leaves - so much so that on Saturday afternoon I went leaf collecting on  my own. Well ok I did have Pixie with me for company ......


My roses were a bit of an amalgamation of bits and pieces of the various tutorials, so I thought I'd write up my own tutorial, not so very different from any of the others really, but I'll know where to find it!


*****************************************************
Maple Rose Tutorial

You will need:

  • Maple leaves (about 6 -7 per rose)
  • Craft wire
  • Scissors
  • Florists wire (optional)

Directions:

1. Choose a nice red leaf for the centre of your rose.


2. Lay out your leaf upside-down and fold over the tips


3. Start rolling your leaf very tightly at an angle pivoting around where the stalk joins. This forms the centre rose-bud part of your rose.


You want to roll it as tightly as you can. If the leaf tears or crinkles a bit, don't worry.


4. Repeat with another leaf or two until you think your rosebud is big enough.


Don't be afraid to get stuck in with the scissors if you want to neaten things up a bit.


5. You now want to start making the outer petals which aren't as tight. So lay out another leaf, but this time don't fold it, just place your bud onto it, and roll it, a little more loosely. At this point it will start to look a bit rubbish but stick with it and it will get better, I promise!


 6. Repeat with another few leaves. Play about with the placement a little bit, and suddenly it will look really rose-like :)


7. Grab a bit of craft wire - I just used some random stuff I've had for ages, no idea where it came from or what it actually is. Each rose needed about 5 inches. Wrap the wire round the base of the flower, tightly.


8. I wanted to display my roses in a vase so I used a piece of florist's wire as a stem - I used this stuff from Hobbycraft. I simply pushed it up through the base of the rose, it didn't need any glue or anything to hold it in place. At this point I clipped the stalks off too (after I took the photo lol!)


9. Finally, display your beautiful roses!


They look great displayed with some other autumn beauties ....


Or with some greenery ....


And of course you could use them without the florist-wire-stem in a centrepiece or on a wreath.


And they look even more beautiful the next day when the leaves start to curl.


Til next time,

Jillxxxx

Friday 29 September 2017

Finish for the Weekend

Hello dear friends and readers!

Welcome to this week's Finish for the Weekend, if you fancy joining in, see below for instructions :)


Hope you have had a good week, mine's been the usual mayhem of children, school runs, and after-school activities. However, as I type it is Friday evening, Little Tomboy is out at football practice - MrEC takes her and gets a takeaway on the way home, so I can revel in the knowledge there are no more people to be driven anywhere by me, and no cooking to be done!

I've got the usual few projects on the go, including ...

- my ripple blanket


- a remote control box cover (yes I know is a bit random) - hoping it will be next week's FFTW.


- the now-a-bit-late Pink (purple) Zazzle scarf for my friend's 50th


(And no I don't deliberately colour code my crochet hooks to my projects! But it pleases me greatly when they match.)

- the now-very-late cross stitch for my cousin's wedding (which was in July - ah well she'll still love it I hope). Needs a bit of a gentle wash too though I think


- my mystery cross-stitch from this post - you can now see what the pinky blotches were ...


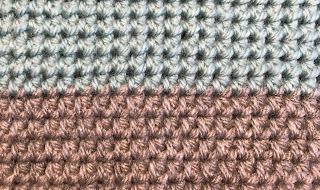
- a scarf which I think was called Traveller Scarf or something, I started it ages ago, and now can't remember what size hook I used, so had to guess when I did a bit of it the other night. As you can see from the photo, the greeny section is ruffling, so I guessed too high a hook. I could just leave it but OCD-me has to rip it back and repeat with a smaller hook. Bah.


My finish for this week is another batch of heart keyrings.


Its a bit cheaty really as this was my Finish for the Weekend post a few weeks back, but as I said then, these have been in a basket in my craft room for the best part of 2 years waiting patiently to be finished.


I have been a Very Good Hooker though and forced myself to get these all completed.


Whether they end up as gifts or craft-fair items remains to be seen. For now I am happy just looking at them all stacked up, so pretty :)


Have a lovely weekend everyone,
Til next time,
Jillxxxx

**************************************************

Welcome to Finish for the Weekend, a weekly chance to link up and share with the blogging community some of the projects you have completed this week. The only rule is that your post must be about an item you have finished this week, hopefully to help reduce some of those piles of UFO's!

Here's how to join in:

1. Write a blog post about your finished project.
2. Link back to Finish for the Weekend by adding this text as a link on your post:
http://emeraldcottage.blogspot.co.uk/search/label/Finish%20for%20the%20Weekend
3. Publish your post
4. Link back from here to your post by clicking "Add Link" and adding your post's URL
5. Spread the bloggy love by visiting and commenting on the other Finish for the Weekend posts.

The Finish for the Weekend post will open for new links on a Friday at 12noon London time, and it will stay open until Monday at 12noon to allow for overseas bloggers to join in. These times may vary but I will do my best to keep it roughly the same. Looking forward to seeing all your posts !